
Packing and Protecting: How to Box, Wrap, and Prep Your Belongings
How you pack is the single biggest factor in whether your belongings arrive intact. Box well, label clearly, wrap what doesn’t fit in a box, and almost everything makes it through fine. Cut corners and you get the story about the box that crushed or the dresser with a watermark on top. The techniques on this page work for both moving and long-term storage — short trips and months in a storage container both stress your belongings, just differently.
If you haven’t done pre-pack prep — sorting, sizing, supplies, appliance cleaning, prohibited items — start with our getting started guide. The loading guide covers weight distribution and securing the load once everything’s packed. The unloading guide covers what happens at the destination.
Pack room by room in the right order
Pack one room at a time. Mixed-room boxes are how you end up with kitchen knives in a bedroom box at the new place.
Start with the room you use the least — guest room, basement, formal dining room — and work toward the kitchen and bathroom, which stay in use until delivery day. Within each room, pack rarely-used items first (out-of-season clothes, holiday décor, special-occasion serveware) and leave daily-use items for the final 24 hours.
The very last 24 hours of items — toiletries, medications, change of clothes, chargers, basic bedding — are not packed for storage at all. They go into your essentials kit (covered on our getting started guide) and stay with you.
Kitchen
The kitchen has the most fragile, awkward, and daily-use items. Two weeks out, start eating down the pantry and fridge. Donate unopened cans. Throw out expired items. Fridge defrost and dry per getting started.
Pack cabinets you don’t use daily first. Work toward everyday dishes and cookware. Leave a small set of plates, cups, utensils, a pot, and a pan for the final days.
- Plates and dishes. Dish pack box. Wrap each plate in paper. Pack on edge — vertical like vinyl records — with crushed paper between. Plates packed flat crack; on edge they support each other. Label FRAGILE on all sides.
- Glassware and stemware. Paper inside each glass, then wrap stem to base, then a bubble-wrap layer. Pack upright in dish-pack dividers, rims up. Crumpled paper fills every gap. Never stack on a glassware box.
- Pots and pans. Medium box. Paper between nested pieces. Dishtowels and oven mitts as void fillers.
- Knives. Wrap each blade in a dish towel. Tape closed. Write “BLADE — SHARP” outside.
- Silverware. Leave flatware in its organizer tray. Wrap the tray in stretch wrap to lock everything in place. Same for utensil caddies.
- Dry spices and seasonings. These pack fine in a small box. Liquids, though — cooking oils, vinegars, sauces, and anything in a bottle — are not packed for storage at all. Take them with you or use them up before packing day (here’s why liquids stay out).
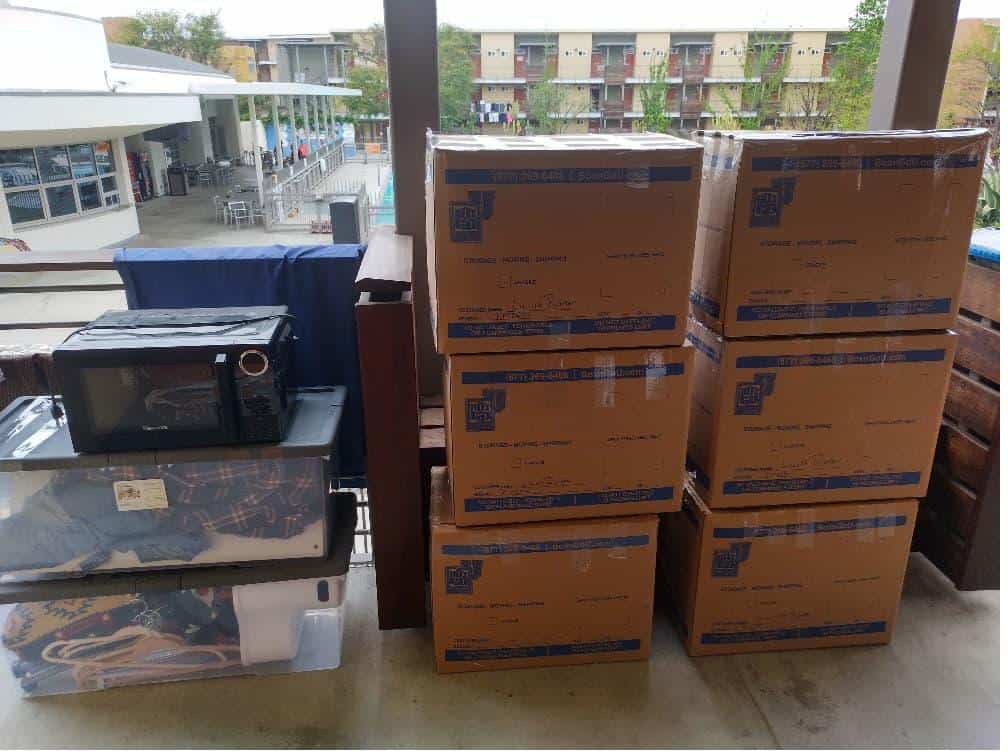
- Small appliances. Clean and dry — 24 hours for anything with a water reservoir. Coil cords. Removable parts in a labeled zip-top bag with the appliance. Original boxes preferred; otherwise wrap in paper and a towel in a medium box. Bag the toaster — it sheds crumbs no matter how clean.
- Pantry. Small boxes only. Canned goods clear 50 pounds before you blink.
Most Popular Sizes
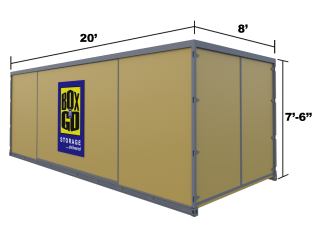
20’ Container – all weather.
Perfect for 3-bedroom residence.
5-7 rooms, furniture, appliances, etc.
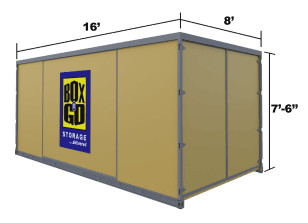
16’ Container – all weather.
Perfect for 2-bedroom residence.
3-5 rooms, furniture, appliances, etc.
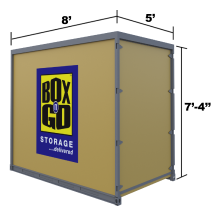
8’ Container – all weather.
Flex – works for any need.
Each fits 1-1.5 rooms.
Bedrooms, closets, and bathroom
Closet first, dresser drawers second, everything else last.
- Hanging clothes. Wardrobe box. Move them straight from rod to box bar — no folding. The box base holds shoes and folded items. No wardrobe box? Slide a garbage bag up over a group of hangers, tie at the bottom with hangers out the top, lay flat.
- Folded clothes. Leave them in dresser drawers if the dresser is sturdy and the clothes are soft — sweaters, t-shirts, lingerie, socks. Nothing breakable, spillable, or sharp. Tape drawers shut from outside, or remove and stretch-wrap the body separately.
- Shoes. Wrap each in paper. Pair them. Pack in a wardrobe box base, a small box, or in drawers. Not with breakables — soles transfer dirt.
- Bedding, blankets, pillows. Large or extra-large box, light only. Vacuum-sealed bags compress comforters and pillows down for long-term storage or tight space. Linens, blankets, and towels also work as cushioning material inside other boxes — wrap a lamp base in a folded blanket, use towels around appliances.
- Curtains and drapes. Best stored on hangers in a wardrobe box — same approach as hanging clothes. Folded works too if you don’t mind a few wrinkles. Wash before packing if they’ve been hanging awhile; dust and food residue attract pests.
- Mattresses. Mattress bags only — sized per mattress. They ride on edge and pick up everything they touch. Box springs too.
- Bed frames. Disassemble. Tie long rails together. Bag every bolt and washer, label “BED HARDWARE — [bedroom name],” tape to the headboard. The headboard rides upright against a storage container wall, padded with a blanket.
- Bathroom. Last room. Aerosols are prohibited — hairspray, shaving cream, deodorant cans, anything pressurized. Dispose of them or take them with you; the full list of prohibited items is on getting started. Liquid toiletries — shampoo, conditioner, lotion, anything that pours — are not packed for storage either. Take them with you or use them up before packing day.
- Jewelry, watches, irreplaceable items. With you, not in the storage container. Same with daily medications, important documents, family photos. See the not-recommended list.
Box-n-Go Storage & Moving - as Easy as 1-2-3
 We Deliver
 We Pick Up
 We Store or Move
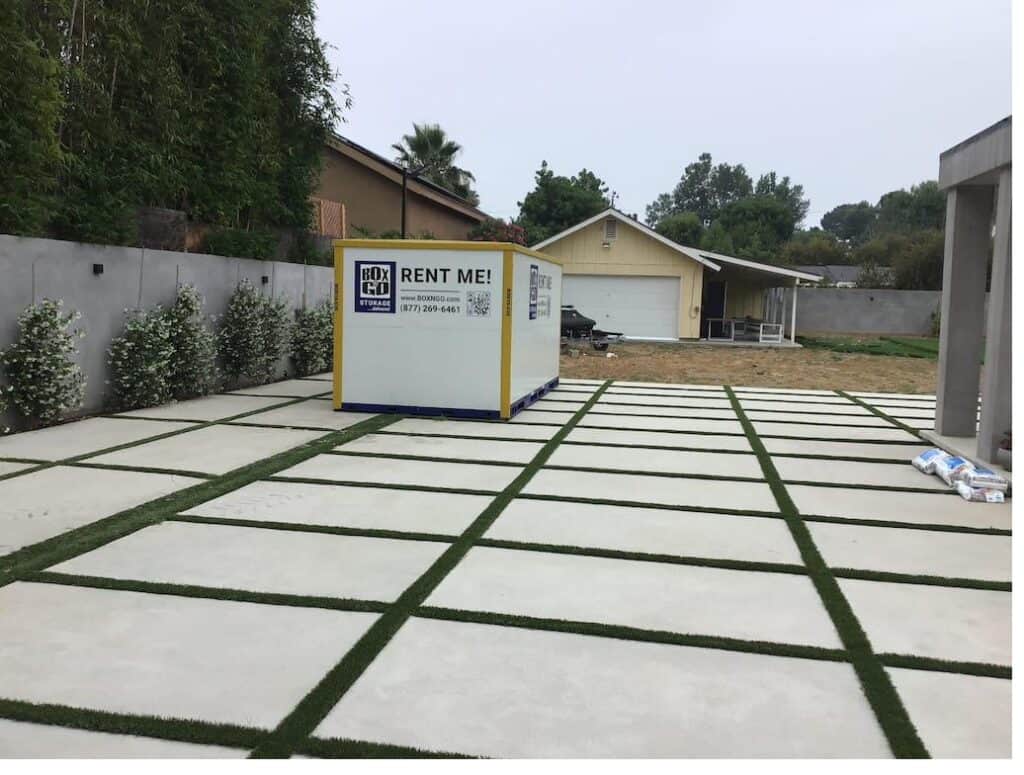
Store on your driveway or inside our secure facility. Load/unload only once. Ground level access.
Living room, dining room, and office
- Televisions. Photograph the back before disconnecting cables. Tape the remote to the back. Under 32 inches: medium box with bubble wrap on the screen and towels filling voids. Larger: TV box with foam corners, or original packaging. Always upright, never flat. Mark THIS SIDE UP and DO NOT STACK.
- Computers, monitors, printers. Original boxes preferred. Otherwise bubble-wrap the screen, photograph the cable layout before disconnecting, remove toner and ink cartridges (they leak), pack with bubble wrap and towels filling voids. Back up files before packing day.
- Stereo equipment. Original boxes ideal. Secure movable parts per the manufacturer (turntable tone-arm clip, CD-player transport screws). Cushion every side. Lighter items stack on heavier.
- CDs, DVDs, vinyl records. Stand on edge, never flat. Crushed paper at the bottom of the box; support both ends with hardcover books or pieces of cardboard cut to fit. Records are heavy — small cartons only. Records without jackets wrap individually in tissue or plastic to prevent scratches.
- Cables and remotes. Bundle each device’s cables, label with the device name, pack with the device. Tape remotes to their devices.
- Lamps. Remove the bulb. Remove the shade. Pack separately. Bulb in a sock or padded box. Shade in its own box, nothing else, nothing on top — crumpled paper inside and around. Label FRAGILE — TOP LOAD ONLY. Base in a medium box, wrapped, gaps filled. Tall floor-lamp bases ride upright in a wardrobe box.
- Artwork, framed photos, mirrors. See fragile items below.
- Books. Small boxes only. Pack flat or spine-down. Never spine-up — binding glue gives over time. Mix book sizes to fill the box.
- Photographs and albums. Family photos, slides, and negatives go with you, not in the storage container. Framed photos that do ride: treat like artwork, pack upright in a separate carton — never mixed with other household items.
- Office furniture. Empty drawers and cabinets. Tape drawers shut from outside. Wrap the body in blankets. Modular pieces disassemble per the instructions; hardware bagged and labeled. Use tape on the pieces themselves to mark where they fit back together — a small mark on each panel saves an hour of head-scratching at the other end.
- Glass-front cabinets, china hutches, TV stands with glass doors. Remove the glass doors if they come out. Wrap each glass panel like a small mirror (painter’s tape X, paper, bubble wrap, mirror carton). The cabinet body wraps in moving blankets.
- Documents. Passports, IDs, deeds, wills, tax records — with you. Routine documents and reference books ride in banker’s boxes.
Garage and outdoor items
The garage holds two kinds of things: items that are not allowed in your storage container, and items that can be packed and stored once they’re drained, cleaned, and wrapped. Take care of the first group before packing day.
Not allowed in your storage container: anything flammable, pressurized, or chemical — gasoline, kerosene, propane tanks, charcoal and lighter fluid, aerosols, spray paint, paint thinner, motor oil, pool chemicals, fertilizers, pesticides, cleaning solvents, and alcoholic beverages. Use up what you can and take the rest to a county household hazardous waste drop-off (most are free). The full list of prohibited items is on the getting started guide.
Everything else can be packed and stored once it’s prepped:
- Lawn equipment (mowers, trimmers, chainsaws, tillers). The fuel is what’s prohibited, not the machine — run the engine until it stalls, then drain any gas and oil that’s left. Wrap exposed blades in cardboard, and bag the small parts (oil cap, gas cap, keys) taped to the equipment.
- Grills. The body is fine; the fuel isn’t. Dispose of charcoal, take the propane tank off entirely (drop it at household hazardous waste or have a refill station empty it), and purge the gas line. Then stretch-wrap the lid and bag any loose parts.
- Tools. Toolboxes travel as-is if they latch closed — stretch-wrap them for extra hold. Power tools go into their cases or in medium boxes with paper; take disposable batteries out, and keep lithium-ion batteries with you. Bundle long-handled tools (rakes, shovels, brooms) with stretch wrap and stand them against a wall, sharp edges wrapped in cardboard or an old towel.
- Bicycles. Wipe the chain with an oiled rag if it’s going more than a few weeks, wrap the frame in blankets, turn the handlebars 90 degrees, and bag the chain and pedals. For long-term storage, let some air out of the tires.
- Patio furniture. Cushions come off and pack separately in a large or wardrobe box. Hose off the frames, dry them, and stretch-wrap. Umbrellas go into their covers or a blanket; leave the weighted base behind.
- Holiday decorations. Use the original cartons if you kept them. Wind lights around a piece of cardboard so they don’t tangle, and box an artificial tree in its original carton, a wardrobe box, or a large box.
- Sports equipment. Golf clubs, fishing rods, skis, and bats go into utility boxes; bag bulkier gear by sport before boxing it.
- Large items (kayaks, surfboards, drained lawn equipment) are loaded into your storage container as they are — padded with moving blankets and secured against the storage container wall.
How to pack a box well
Six rules cover most of it.
1. Small box for heavy items, large box for light items. Counter-intuitive but professional. A large box of books collapses when you lift it. A small box of pillows is wasted space. Small boxes for books, dishes, canned food, small appliances, file boxes. Medium for pots and pans and mid-weight items. Large or extra-large for pillows, linens, towels, comforters — light bulky things only. Full size breakdown on our getting started guide.
2. Cap every box at 50 pounds. Absolute ceiling. Anything heavier is a back injury and a box failure waiting to happen. Quick test: if you can’t lift it slightly off the ground in one attempt, take items out.
3. Heaviest items at the bottom. Always. Applies inside the box and when boxes stack together. A small box of books at the top of a stack will eventually crush whatever’s beneath it.
4. Fill every empty space. Air pockets are where damage happens. Items rattle into each other in transit, pressure points form, the box can collapse under stacking weight if it’s not structurally full. Crumpled paper, packing peanuts, towels, sweaters, linens — any of them work. The shake test: pick the sealed box up and shake gently. If you hear anything rattling, open it back up and add filler.
5. Layer the box. Padding at the bottom (a few inches of crumpled paper or foam), heaviest items first, mid-layer pad, lighter items, final pad on top. Wrapped fragile items in the middle get protected on all six sides. For crystal and fine china, use the “double-box” method: wrap, put in a small padded inner box, then nest that inside a larger box with at least two inches of padding on every side.
6. Seal with the H-tape pattern. Tape across the center seam, then two more strips perpendicular — forming an H on top and bottom. Much stronger than a single strip. Use real packing tape (2-inch clear PVC). Duct tape and masking tape peel off in heat and aren’t designed for the stress.
A few add-ons:
- Never mix rooms in one box. Mixed boxes are the ones you can’t find anything in for weeks.
- Keep parts and pairs together. Both shoes, full dish sets, all components of a lamp.
- Dish packs (double-walled boxes) for fragile kitchen items. Two layers of corrugated cardboard give much more crush protection than single-walled.
- Don’t reuse beat-up boxes. Free grocery boxes have compromised corrugation and weak bottoms — they fail at the worst time. New boxes hold up much better, especially for anything sitting in storage for weeks or months. Box-n-Go delivers boxes with your storage container in a single trip — see our supplies catalog.
Labeling that actually works
A box without a useful label is a box you have to open to identify. Multiply that by the number of boxes in a move and unpacking becomes a guessing game.
Label every box on at least three sides and the top. Labels on a single side become invisible the moment boxes get stacked.
Pack-seal-label as one motion. Don’t pack a stack of boxes and tell yourself you’ll label them later. You won’t.
Be specific about contents. “Toys” tells you nothing useful when you’re looking for the action figures. “Living room books” beats “books.” “Living room — encyclopedia and art books” is better still. A label should be specific enough to find the box without opening it.
Use a wide-tip permanent marker. Pen labels smear; pencil disappears. Red or pink marker draws the eye to FRAGILE labels.
Standard label format:
- Room name — KITCHEN, MASTER BEDROOM, GARAGE, OFFICE.
- Contents — three to five specific words.
- Handling notes — FRAGILE, THIS SIDE UP, DO NOT STACK, OPEN FIRST. Big block letters.
- Box number — pairs with a master inventory list (see below).
Keep a master inventory list. Notebook, spreadsheet, or phone notes app — pick whatever you’ll actually use. Number every box and write down the room and a slightly longer contents description than fits on the label. Three benefits: you can search the list for a specific item, you know if a box is missing at the destination, and the list doubles as documentation if anything is damaged or lost.
Mark FRAGILE boxes clearly. Big block letters on all sides plus the top. Red or pink marker. Some customers use bright-colored tape to flag fragile boxes specifically. The goal is unmistakable visual signal — at a glance, no matter the angle, that box gets handled differently.
Mark “OPEN FIRST” boxes separately. Items you’ll need within the first day at the destination — coffee maker, paper towels, basic kitchen supplies, sheets — ride in the storage container but need to be unloaded first. Label them “OPEN FIRST — [ROOM]” so they don’t get buried.
Color-coding works if you do it consistently. Assign one color to each room. Colored tape, marker, or sticker on every box for that room. Sign on each door at the destination matching the color. The catch: half-color-coded labels are more confusing than no color coding at all. Do the whole house or skip it.
Wrap and protect fragile items
The general principle: every fragile item gets at least two layers — a soft layer directly against the surface, then a cushioning layer on top. Paper first, bubble wrap second. Never skip the paper layer on finishes or printed surfaces — bubble wrap touching painted wood, polished metal, or printed labels can leave marks over time.
Glassware and stemware. Stuff packing paper inside each glass (compresses the empty space, supports the rim). Wrap from the bottom up, gathering the paper around the stem. Add a second layer of bubble wrap, taped closed (tape on the wrap, never on the glass). Pack upright in dish-pack dividers, rims up. Crumpled paper fills every gap so nothing shifts.
Ceramics, china, pottery. Same approach — paper layer first, then bubble wrap. Plates on edge, vertical, never flat-stacked. Bowls nest with paper between each one. Cups and mugs wrapped individually with extra paper inside the bowl.
Mirrors and framed art. Five steps, in order:
- Tape an X across the glass with painter’s tape, corner to corner. The X holds the glass together if it cracks in transit and keeps shards from spreading.
- Glassine paper or plain packing paper across the front of the artwork. Newsprint can transfer ink onto canvas, finishes, or paint — only the clean unprinted paper goes against the work.
- Cardboard corner protectors on each corner. They slide on and prevent puncture from neighboring items.
- Bubble wrap around the whole piece, bubbles facing outward (smooth side against the work). Tape closed on the back side only.
- Mirror box sized three to four inches larger than the piece on each side. Fill the gap with crumpled paper. Mirror boxes never lay flat — they ride upright against a storage container wall, padded with a moving blanket, wedged between stable items.
For oil paintings on canvas: paper never touches the painted surface. A piece of acid-free or glassine paper goes between canvas and any bubble wrap. For high-value or oversized art, professional crating is worth the cost.
Figurines, collectibles, ceramics with detail. Wrap individually with paper around every protrusion (arms, ears, tails, handles). Then a layer of bubble wrap. Then a small padded box that goes inside a larger box with at least two inches of padding on every side — the double-box method. Never pack figurines loose in a larger box with other items.
Lampshades. Each shade in its own box. Crumpled paper inside the shade and around the outside. Nothing else in the box, nothing stacked on top. Label FRAGILE — TOP LOAD ONLY in big letters.
Crystal, fine china, anything irreplaceable. Double-box method without exception. Wrap, place in a small padded inner box, place that inside a larger outer box with at least two inches of padding on every side. The inner box “floats” inside the outer. For pieces of real value, consider taking them with you instead — or review our protection plan options if they’re traveling in the storage container.
Disassemble and protect furniture
Furniture takes more time than any other category, and shortcuts here cost the most when something gets damaged.
Standard furniture (sofas, dressers, tables, bed frames, bookshelves)
Disassemble what you can. Beds come apart, table legs unscrew, modular shelving breaks down, sectionals separate. Reverse the assembly steps. Photograph as you go — three or four photos per piece saves hours at the other end.
Bag every screw, bolt, washer, dowel, and Allen key. Zip-top sandwich bags. Label each with the piece it belongs to. Tape each bag directly to the piece it came from.
The wrapping rule that matters most:
- Wood and leather get a moving blanket directly on the surface. Stretch wrap holds the blanket in place. Plastic wrap never touches wood or leather directly — it traps the material’s own moisture against the finish, can leave marks, or melt and adhere in heat. Blanket first, then plastic. Always.
- Fabric upholstery can be stretch-wrapped directly. Protects against dust, snags, stains. A blanket over the wrap adds impact protection.
- Glass tabletops separate from the base. Wrap like a large mirror — painter’s tape X, paper layer, bubble wrap, mirror or picture box.
- Drawers stay in place if the dresser is sturdy — tape shut from outside with painter’s tape (packing tape can damage the finish). For heavy dressers, removing drawers makes the body lighter to move.
- Pianos. Grand and baby grand pianos need a professional piano service for preparation. Upright pianos (spinet, console, studio) usually don’t need advance prep beyond pad-wrapping the surface. Plan to have any piano tuned after it comes out of storage.
What Our Customers Think
IKEA, RTA, and flat-pack furniture
Particleboard and MDF furniture (IKEA, most flat-pack, ready-to-assemble) is the most fragile category in any move. Joints designed for one assembly often fail on the second. Disassemble large pieces — beds, wardrobes, dressers, tall bookshelves — and reassemble at the destination. Moving them assembled is the most common cause of damage.
- Photograph each step in reverse. Before removing a single cam lock, photograph intact. Then photograph after each step. More reliable than the original instructions.
- Don’t over-tighten on reassembly. Particleboard threads compress; overtightening strips the hole and the joint never holds again.
- Keep cam locks, dowels, and special hardware with the panels they came from. Zip-top bag per piece, labeled, taped to the largest panel.
- Wrap panels individually in moving blankets. Don’t stack unwrapped panels — corners ding and laminate edges chip.
- Mark fragile edges and corners. The laminate edge chips first.
If a piece was glued or has been assembled more than a few years, the joints may not survive disassembly. Worth deciding in advance whether it’s worth replacing if disassembly destroys it.
Mattresses and box springs
Mattress bags, every time. One per mattress and one per box spring, sized to the mattress (twin, full, queen, king, California king, crib). Prevents stains and surface contamination. Mattresses ride on edge against a storage container wall. For long-term storage, tape the bag closed at the open end so nothing settles inside.
Upholstered furniture (sofas, chairs, ottomans)
Vacuum thoroughly before wrapping. Body oils, crumbs, and pet hair attract pests over time. Treat visible stains before storage — old stains set permanently when fabric sits.
Cushions come off the frame. Pack in a wardrobe or large box, or stretch-wrap individually and tuck inside the body of the furniture they belong to.
Stretch-wrap the body (fabric upholstery wraps directly). Add a blanket over the wrap if the piece loads near items that might press against it.
Sectionals separate into pieces — pack each as its own unit. Connector hardware bagged and labeled.
Our Services
Personal & Business Storage
 Student Storage
Local & Nationwide Moving
Packing & Loading Help
Student Storage
Local & Nationwide Moving
Packing & Loading Help
 Moving Boxes & Supplies
Prep and protect appliances
The cleaning and drying prep happens before packing day — covered on getting started. If you haven’t done the prep yet, do it first. Defrost, drain, dry, clean. Moisture trapped in a closed-up appliance grows mold inside the appliance itself.
Liquids of any kind are prohibited from the storage container. That includes anything that could produce liquid during storage — an un-defrosted refrigerator, a portable air conditioner that wasn’t drained, a swamp cooler with water still in it. You’re responsible for any damage liquids cause to your belongings or to neighboring containers, so don’t shortcut the drying step.
The wrap step below happens after prep, on packing day.
Refrigerators and freezers.
- Confirm the prep is done first. Defrosted, interior wiped dry, door propped open with a spacer for at least a day so the interior air-dries completely. That’s covered on our getting started guide. If you haven’t done it yet, do it now — the spacer trick is only for the drying phase.
- Drop an open box of baking soda into each compartment for odor control during storage.
- Either pack shelves and bins separately in a labeled box, or collapse the racks and use the empty fridge cavity to hold boxes during transit. The interior-cavity trick is covered on our loading guide.
- Close the door and tape it shut with painter’s tape so it doesn’t swing open. The door does not ride open during transit or storage — it’s closed and wrapped.
- Moving blanket around the body. Stretch wrap holds the blanket in place. Tape the cord coil to the side of the appliance.
- Fridges ride upright, never on their side. Lying a fridge down can damage the compressor.
- Wait 24 hours before plugging the fridge back in at the destination. The compressor oil needs time to settle; plugging it in too soon can damage the compressor. After the unit comes back online and the icemaker starts up, dispose of the first few batches of ice to clear any impurities from the water line.
Washing machines.
- Disconnect and drain hoses completely. Hoses in a labeled zip-top bag, taped to the back of the washer.
- Run the drum dry. After the final use, leave the door propped open for a day so the drum interior air-dries — same drying-phase logic as the fridge. Wipe out any residual water in the gasket and detergent tray.
- Some front-loaders use shipping bolts to lock the drum during transit. Check your manual — if your model came with shipping bolts and you saved them, reinstall them before moving. If you didn’t save them, the manufacturer can usually ship replacements.
- Close the door and tape it shut with painter’s tape. The drum is dry now; the door doesn’t ride open.
- Moving blanket around the body, stretch wrap to hold it.
See How Our Services Can Work for You
- Call or order online in minutes
- We deliver storage to you
- Pack at home, at your convenience
- Store on your property or at indoor facility
- Move locally or nationwide
- Call or order online in minutes
- We deliver 16′ and 20′ storage to you
- Pack at home, loading labor available
- Store on your property
- Secured Extra Space
Dryers. Disconnect the vent hose; bag with the washer hoses. Gas dryers: gas line disconnect by a qualified person only. Same wrap technique as the washer.
Dishwashers. Drain completely. Run an empty cycle a day before packing to clear the lines. Disconnect water and drain lines. Wrap as above.
Stoves and ranges. Gas: gas line disconnect and reconnect by a qualified person. Electric: unplug, coil cord, tape to the back. Remove racks, drip pans, and burner grates — bag and tape to the unit, or pack separately in a labeled box. Tape burners or coil elements to the top of the stove. Tape down all knobs. Tape the door closed with painter’s tape. Wrap the body.
Microwave ovens. Remove the glass turntable and pack it separately wrapped in bubble wrap. Original box if you saved it; otherwise a well-cushioned medium box. Don’t put cardboard in the door opening — it can spring the door during transit. Tape the door shut with painter’s tape. Tape the power cord coil to the back. Wrap the body.
Small appliances. Covered in the kitchen section above.
Gas appliances generally. California requires gas line disconnect and reconnect by a licensed professional. Box-n-Go does not handle gas work — schedule with your gas company or a licensed plumber a few days before packing day.
What changes for long-term storage
If your belongings will sit packed for more than a few weeks, a few techniques worth knowing on top of the basics above.
Clean and dry everything before packing. This is covered on our getting started guide. Items packed wet or dirty cause problems inside their own packaging — fabric grows mildew in its packaging, food residue attracts pests, leather develops watermarks. The storage container’s design doesn’t change that; the packaging does. The shorter the storage, the more forgiving; the longer the storage, the more it matters.
Vacuum-sealed bags for fabrics. Comforters, pillows, sweaters, off-season clothing, linens. The bag compresses the item to a fraction of the size and blocks moisture from settling on the fabric itself. Worth the cost for long-term storage of any fabric you care about.
Desiccants in moisture-sensitive boxes. Silica gel packets in boxes of fabrics, leather goods, electronics, photos, books — anywhere trapped moisture in the packaging could cause trouble. Inexpensive insurance for long-term storage. Note: desiccants lose effectiveness over time. For storage longer than six months, replace them at the six-month mark.
Breathable covers, not plastic, for upholstered furniture in long-term storage. Cotton or canvas furniture covers let the fabric breathe while keeping dust off. Plastic wrap holds in the fabric’s own ambient moisture and can leave watermarks on light upholstery over months.
No plastic against wood or leather. This was covered in the furniture section above and bears repeating for long-term: a moving blanket goes against the surface, plastic wrap only goes on top of the blanket to hold it in place. Plastic in direct contact with wood or leather over months can leave marks, trap the material’s own moisture, or melt and adhere in heat.
Books on their spines, not their pages. A book stored spine-up over months will see the page block separate from the binding. Pack books flat or spine-down.
Plan a check-in for storage over three months. If you store with us for more than a quarter, schedule a visit to your storage container at our warehouse. We make access available — see our access page for how visits work and storage container information for what to expect when you arrive. A 30-minute check-in catches any issue early.
Items we recommend you don’t pack
A handful of items should not be packed into your storage container at all. Some are prohibited by law (hazardous materials), some by Box-n-Go policy, and some because the safer choice is to keep them with you regardless. The full list of prohibited items is on our getting started guide and includes:
- Hazardous materials — flammables, pressurized containers, corrosives, toxics. Federal law and our rental agreement prohibit these.
- Liquids of any kind — oils, sauces, drinks, toiletries, cleaning products, sealed or not. Don’t pack them. A box of liquids is heavy, so it settles at the bottom of a stack, and once other items press down on it, even a capped bottle can be crushed and leak. A spill ruins everything packed around it — and because storage containers are stacked in our warehouse, it can reach another customer’s belongings too, which you’d be responsible for. Household liquids and cleaning products are cheap to replace, so it isn’t worth the risk: use them up, give them away, or throw them out (or, if you’re moving, take them with you). This also covers anything that could produce liquid in storage, like an un-defrosted refrigerator or an undrained air conditioner. The one liquid worth the trouble of moving is a genuinely valuable wine collection — but it still doesn’t belong in a storage container, which isn’t temperature-controlled: heat cooks wine and freezing can push the cork. Move it yourself in a climate-controlled vehicle, bottles on their side, or use a specialty wine shipper for a large or rare collection, and appraise it first.
- Firearms and ammunition — these don’t go in the storage container or with the movers. Ammunition is a combustible hazard that isn’t allowed in storage or on a moving truck, and we keep firearms out as well. Transport them yourself, following ATF and state law: firearms unloaded and in a locked case, ammunition carried separately, kept with you like your other valuables. For a long-distance move you can’t drive, a licensed FFL dealer can ship firearms for you.
- Perishables and living things — food, plants, animals. They spoil, leak, or attract pests.
- Items we don’t recommend storing — cash and securities, jewelry and furs, irreplaceable documents and family photos, daily-use medications, original artwork and fine art, antiques and heirlooms, musical instruments, high-value electronics, items damaged by temperature or humidity, anything extremely fragile. You can store them, but at your own risk per your Rental Agreement. Protection plan options may cover some of these — review before storing anything irreplaceable.
If you have something specific in mind and aren’t sure, call us at 877-269-6461 before you pack it. We’d rather answer the question than have someone discover the answer at pickup.
Why Box-n-Go?
- No truck to rent. We deliver storage to you!
- Load/Unload only once.
- Pay only for space you use.
- Secure, climate-friendly facility.
- Ground access
No Truck to rent…EVER!
- Save money and time.
- Reduce the risk of accidents and injuries.
- No need to pay for gas, insurance & mileage!
Load ONCE Storage Solution!
- You only need to load your belongings once!
- No need to load and unload it all again into a storage unit.
- All containers come with easy ground level access!
Pay Only for the Space You Use!
(if storing at our facility)
- No not need to guess on how much space you actually need.
- Order an extra 8’ x 5’ unit. Do not use it – do not pay for it.
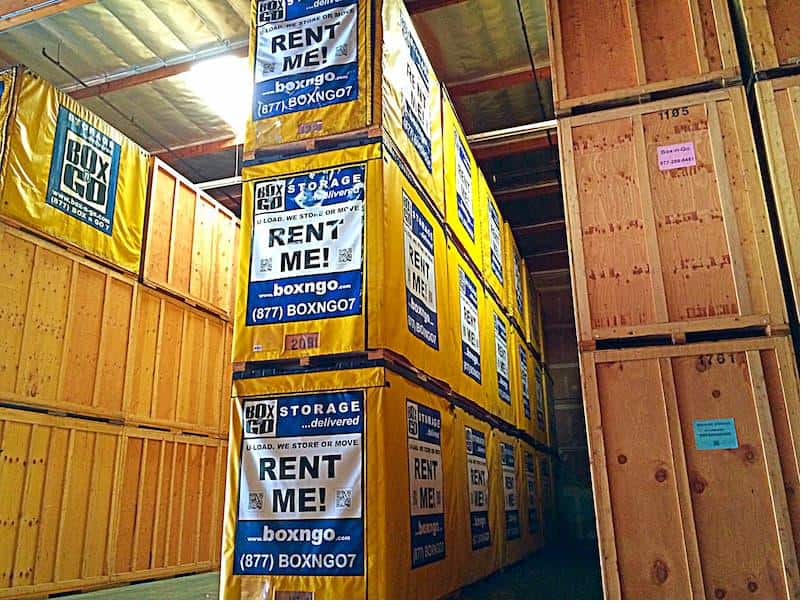
Secure, Climate-Friendly Facility!
- Highest degree of security and protection.
- Our 8’ x 5’ units are breatheable – no mold or mildew.
- No funky smell when your belongings return.
EASY Drive-Up Access!
(if storing at our facility)
- Access your units at ground level.
- No elevators, ramps, stairs to climb.
- Schedule access appointment & drive straight to your units.
Frequently asked questions
How long before delivery should I start packing?
Two weeks for a small home, three to four for a larger one. The packing itself isn’t what takes the time — the decisions about what to keep, what to toss, and how to wrap things you’ve never wrapped before are what take the time.
Can I leave items in dresser drawers?
Soft, lightweight items only — sweaters, t-shirts, socks, lingerie. Nothing breakable, spillable, or sharp. Tape drawers shut from outside with painter’s tape or remove the drawers entirely.
Do I need a wardrobe box?
For closet clothes, yes — they’re worth the cost. The alternative is folding everything, which adds a few hours of ironing at the destination. For a few dressy items, a garbage bag tied around hangers works as a budget option.
How heavy can a box get?
Fifty pounds is the practical ceiling. Anything heavier is a back injury and a structural failure waiting to happen. If you can’t lift it slightly off the ground in one good attempt, take items out.
Should I use packing peanuts or paper?
Either works. Peanuts conform to odd shapes well; paper is cleaner to work with and easier to dispose of. Both fill voids and protect items.
What about plastic bins versus cardboard?
Cardboard for most items — it stacks well, it’s sized for moving, and it’s the standard. Plastic bins with rubber gasket seals are worth it for specific long-term scenarios where you want maximum moisture protection on fabrics. They cost more and stack less efficiently.
Can I tape labels onto items instead of writing on the boxes?
Either works. Some customers use pre-printed labels for room names and write contents underneath. The label or the writing must survive the trip — pencil rubs off, pen smears, only permanent marker holds up.
Do I need to pack everything in boxes?
No. Furniture, large appliances, mattresses, mirrors, lamps, sports equipment, and bicycles ride in the storage container as-is, padded and secured. The boxes are for everything that fits in one.

Where to go from here
Once your belongings are packed, labeled, and wrapped, the next step is loading the storage container.
Education guides — your roadmap end to end:
- Getting started — pre-pack prep if you haven’t been through it yet.
- Loading the storage container — what to load first, weight distribution, anchor points, securing the load.
- Unloading at the destination — room-by-room sequence, accessing stored containers, what to expect at pickup.
Help and resources:
- Boxes and packing supplies catalog — everything we deliver with your storage container.
- Pro Pack and Full Service — when you want a crew to pack or load for you.
- Customer FAQ — the comprehensive question and answer library.
- Storage container information — sizes, construction, and what fits where.
- Contact us — phone, email, hours, and direct support.
About Box-n-Go:
- Box-n-Go vs. traditional self-storage — why portable storage works better for most projects.
- Box-n-Go for movers — how the service works for local and long-distance moves.
- Protection plans and damage waivers — coverage options for your belongings.
- Why Box-n-Go — the people, the history, the operations.
- Customer reviews — what 500+ customers say across Google, BBB, and Yelp.


